Flow test
Introduction
Creating a new visual test is an easy and straightforward process, and above all, it is optimized for ecommerce. To start, just to click on the button "+ New test" located at the top right corner of the application window.
Test creation wizard
The test creation is a guided process which can be slighty different according to the testing requirements. Valido simplifies the process of creation and maintenance of visual tests through its easy-to-use wizard feature. No technical skills needed!
Starting the wizard
The wizard is composed of a few steps, in particular:
- Choosing the template
- Configuring the properties & countries
- Configure the actions (optional)
- Summary and confirmation
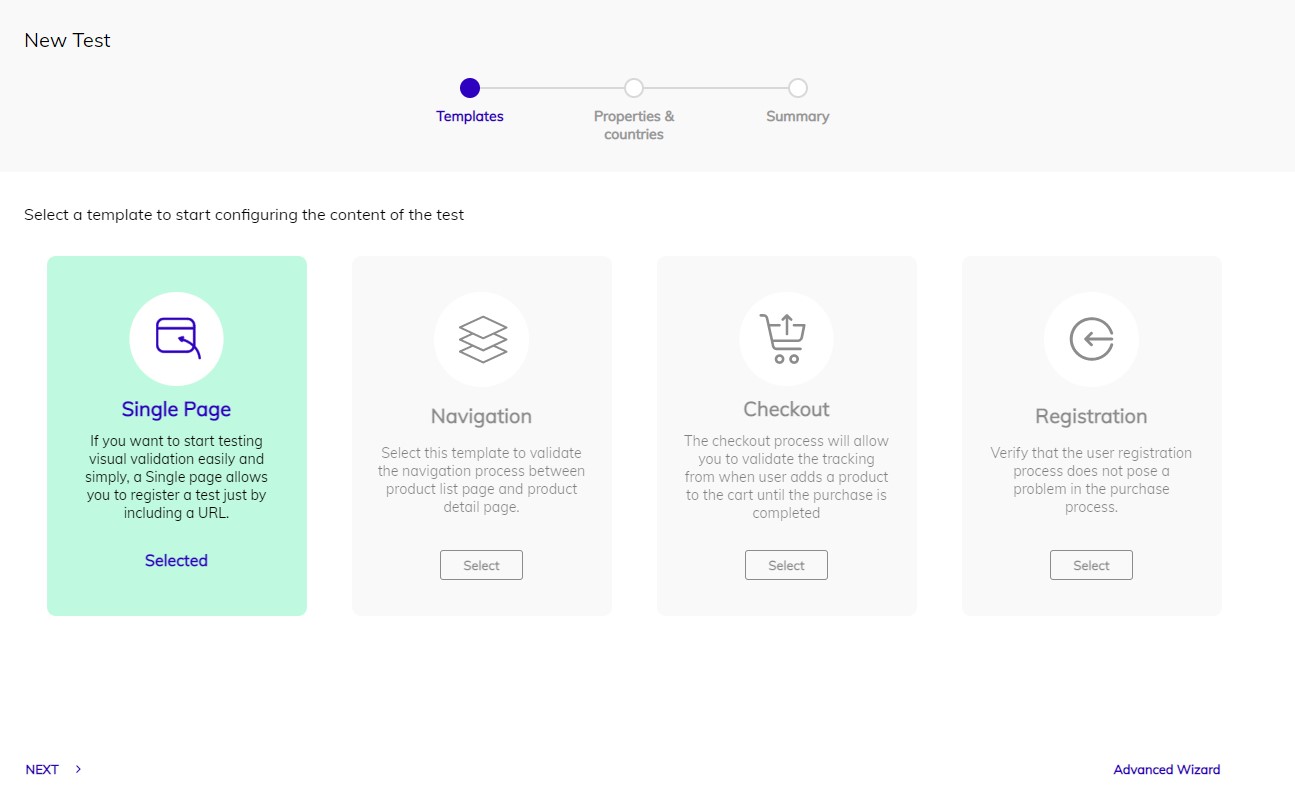
Let's review each of these steps.
1. Choosing the template
In the first step, a few templates are presented on the screen.
Each template is selected based on the type of visual testing that is needed, and defines the scope of the test.
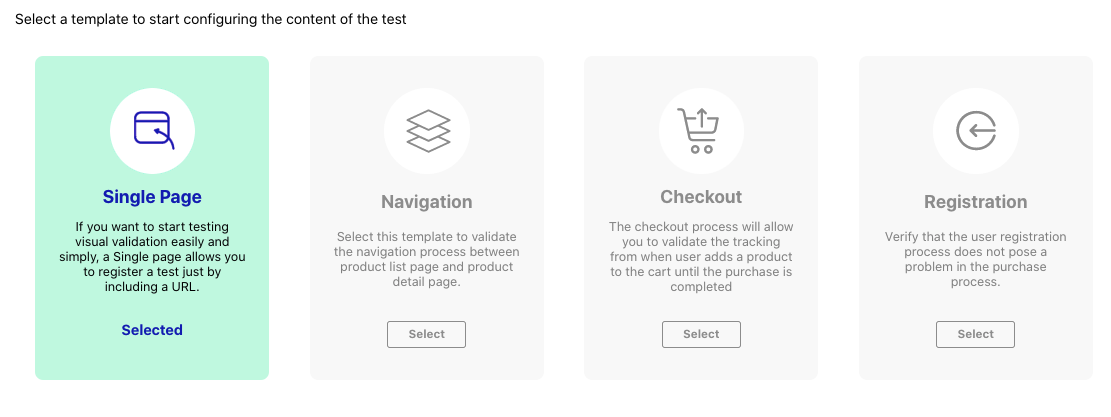
The available options are:
- Validating a "Single Page"
- Validating an ecommerce flow: "Navigation", "Checkout", or "Registration".
Single Page
When should you use the "Single Page" option?
The Single Page validation is used when you only need to navigate to a single page URL and verify its UI appearance.
It is a fundamental building block for the other ecommerce flow validations. However, the single page template does not include any validation of UX/UI functionality, for example, clicking a button to purchase or filling in a form. It is just to test that the specific page renders as expected.
Examples of Single Page Validation
This test type can be adopted in a wide range of scenarios for an online store. Examples:
- Checking that the home page renders as expected
- Checking that a new campaign landing page renders as expected
- Checking that a static page like an "About" page renders as expected
- Checking that a specific category page renders as expected
- Checking that a specific product page renders as expected
In addition, more specific requirements can be covered:
- Checking that a featured product page always displays available stock or an alternative recommendation
- Checking that the display of promotional prices are activated (or off) in a specific category or product page
- Checking that the new campaign marketing content has been propagated to the home page. A specific example could be a campaign popup overlay that appears over the page.
Navigation, Checkout and Registration Validation
When should you use the "Flow" option?
The Ecommerce flow validation is used when you rather need to test a whole sequence of actions (steps) can lead to make a checkout, register a new user or simply navigate different catalog pages of your ecommerce.
Configuring the actions composing ecommerce behaviours, it will be possible to keep under control entire flows.
Examples of Flow Validation
This test type can be adopted in a wide range of scenarios for an online store. The most common are the scenarios reported directly in wizard templates, in particular:
- Checking that navigation of different catalog pages (commonly Home Page, Category and Product)
- Checking that the registration process of a new customer works as expected
- Checking that checkout steps work properly from the PDP until the payment page.
In addition, more specific requirements can be covered adopting the template "Custom" (still in progress).
2. Configuring properties and countries
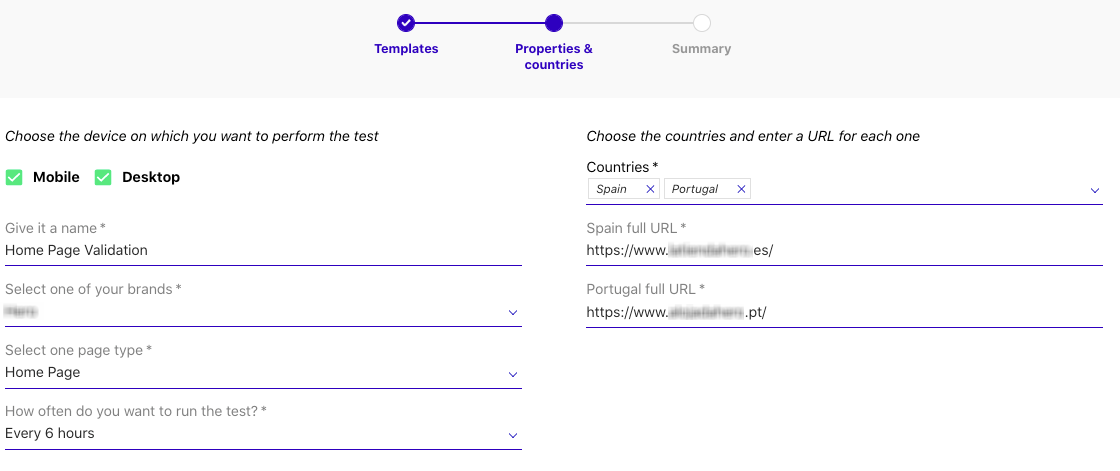
Next, the test properties need to be configured. These are:
- The device resolution: Mobile, Desktop or both
- The name of the test, for example "Home Page Validation"
- The brand (select from the list of brands configured for the account)
- The page type
- The frequency of the test executions
Finally, select the countries to test and input the corresponding URL for each chosen country.
3. Configuring the behaviors and actions
This step is only needed for the ecommerce flow tests, and is not required for the Single Page Validation.
In addition, according to the selected device, you could need to add more configurations: usually a dedicated one for Desktop and another one for Mobile/Tablet.
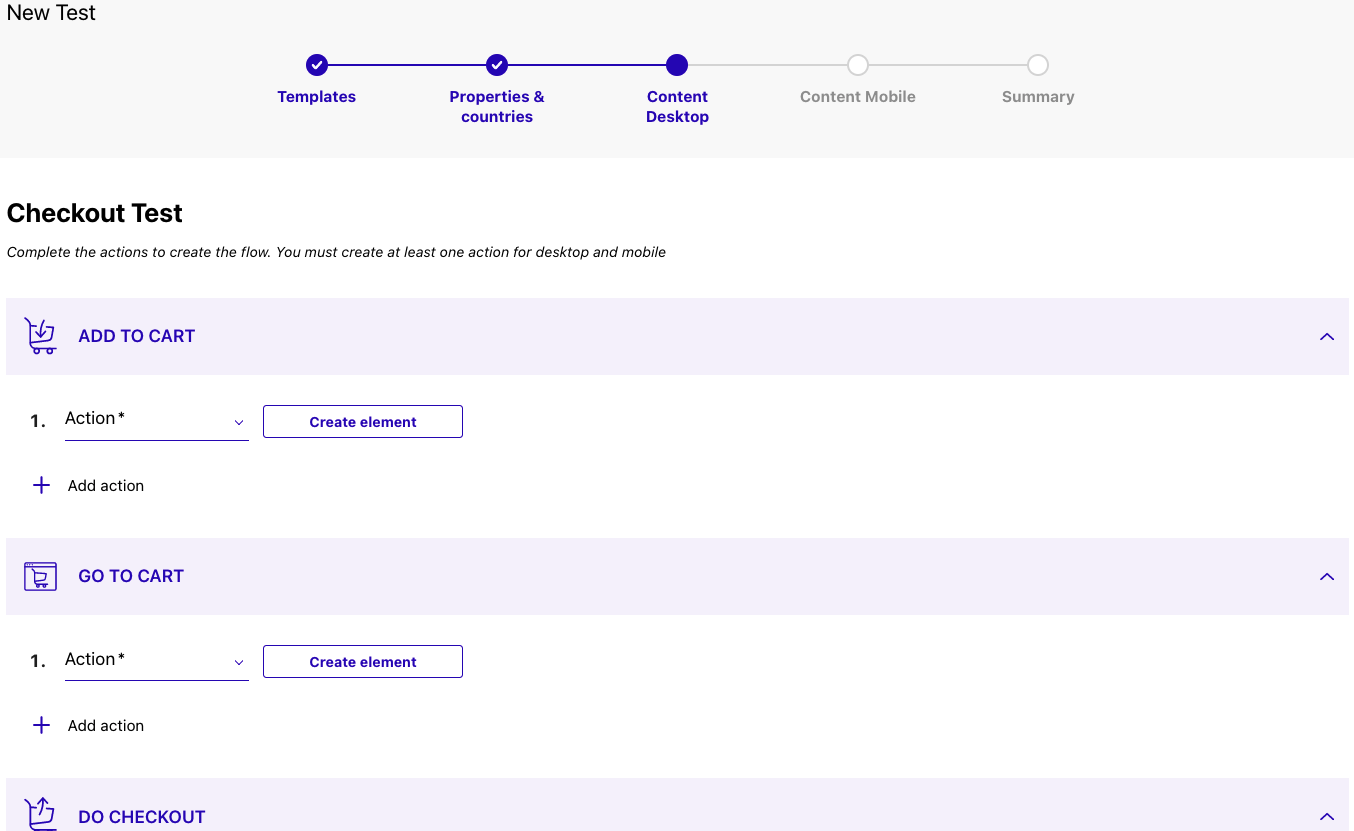
Every behaviour (in the above example, "Add to cart", "Go to cart", "Do checkout") should be configured as a sequence of specific actions. The supported types of actions are:
- Click: any action triggered by a mouse click
- Input: any action triggered by the input of data (login, adding an addres and so on)
- Select: any action triggered by the selection of a option (selecting the payment method or default address and so on)
- Custom select: advaced type of action not supported by the previous types
Any action is executed always over a spefic element.

In the following section will be described the creation of the elements.
4. Review and confirm
The final step of the wizard is to review the test configuration details based on the previous steps. Once you are satisfied with the configuration, click Finish to confirm the test creation.
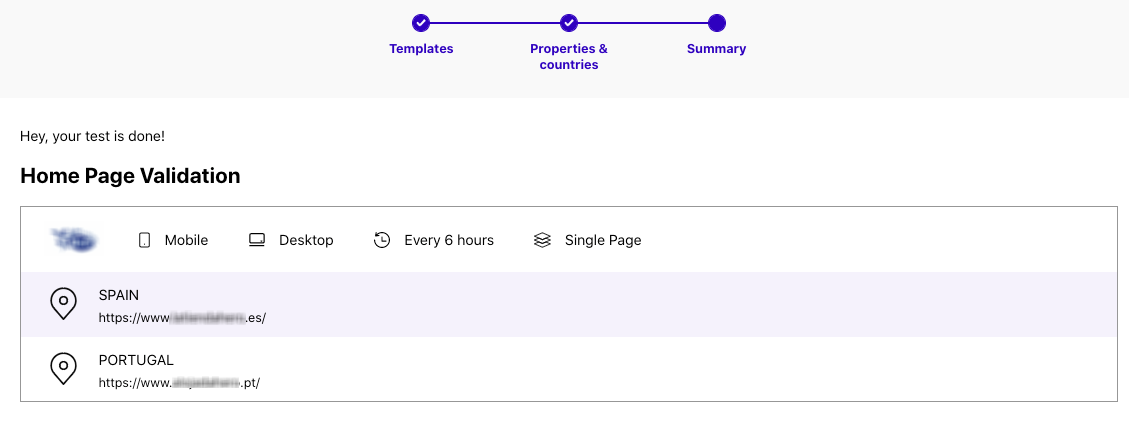
Congratulations, your test has been created!
Once the test has been created succesfully, it will execute according to the configured properties. It will subsequently appear in the Tests tab and the results will be reported in the Dashboard page.
